Create Lovely Text with Cat Print Pattern in Adobe Photoshop

From this tutorial you will learn how to create awesome pattern with cat paws using default custom shapes. In the process of work we are going to apply various layer styles, will also create work path from text and will stroke it with direct selection tool and default brush.
All Photoshop versions are applicable as I haven't used fonts, brushes or instruments exclusive for the higher versions.
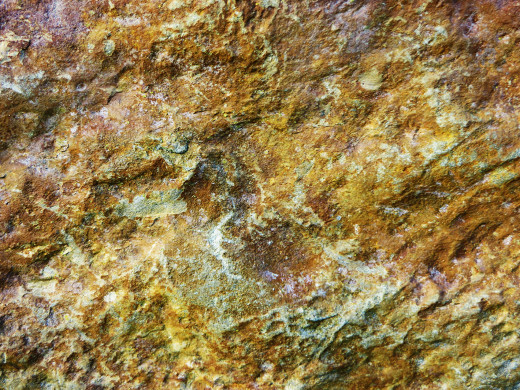
The Stone Texture used is my own photo and unrestricted stock.
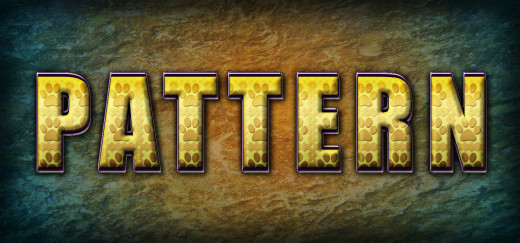
This is the outcome you should get after following my steps:

STEP 1
Start your work with creating a new folder. Name it Text with Cat Print or Cat Paws Text if you like. In this folder you are going to keep both text and pattern .psd files, the Stone Texture you should download in Step 3 and of course, the final image that you'll create.
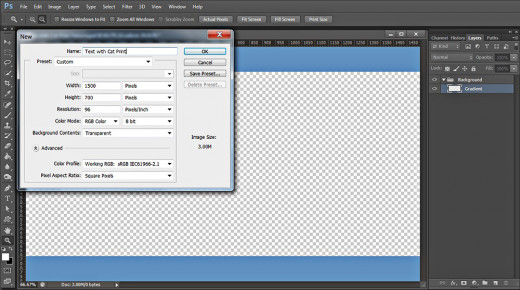
Now open Adobe Photoshop, navigate to the Menu bar and select File, New to create a new .psd document. Name it Text with Cat Print, change the Width to 1500px and Height to 700px. Insert 72 or 96 Pixels/Inch for Resolution, choose RGB Color Mode and set the Background Contents to Transparent.
Rename Layer 1 to Gradient then press Ctrl+G or click on the Folder icon at the bottom of Layers panel to place the layer in a group. Rename Group 1 that you'll get to Background.
Create Background with Radial Gradient, Stone Texture and Inner Shadow
In Steps 2-6 your task is firstly to colorize the canvas with blue and orange Radial Gradient. After the Background have been filled with the Gradient, you are going to add Stone Texture to create interesting relief. For the purpose you have to change the Blend Mode and Fill Opacity of the Texture. To complete the Background, you'll add Inner Shadow to darken the borders of the Background and create Vignette Effect.
STEP 2
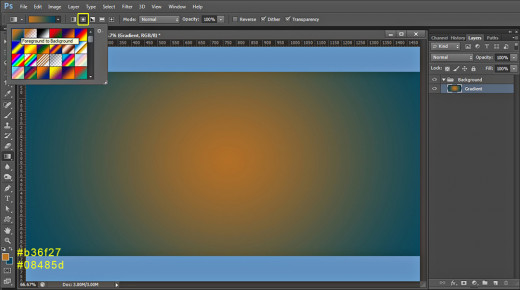
In this step we are going to colorize our Background with my favorite colors combination- blue and orange. OK, keep Gradient layer selected then change the Foreground Color to #b36f27 and Background Color to #08485d.
Grab Gradient Tool (or just press G), select Foreground to Background type of Gradient and also click on the Radial Gradient icon. Click with the instrument selected in the middle of the canvas and move to any of the corners and voila- you already have a nice colored gradient background.
STEP 3
You need to download this Stone Texture in order to finish the work in Background group. So click on the texture to get it in high res, right click on it and select Save As to place it in your folder.
STEP 4
Create a new layer above Gradient layer in Background group and name it Stone Texture. Copy the Texture you downloaded in the previous step and paste it in this new layer. If you don't know how to do it, just open the Texture in Photoshop, press Ctrl+ A then Ctrl+C to select and copy, then go back to your Text with Cat Print .psd document, select the Stone Texture layer and press Ctrl+V to paste the image.
STEP 5
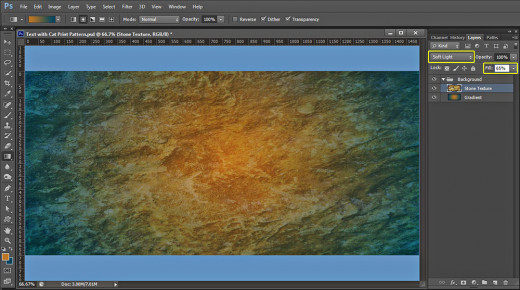
Change Blend Mode of Stone Texture layer to Soft Light and reduce its Fill Opacity to 65%.
STEP 6
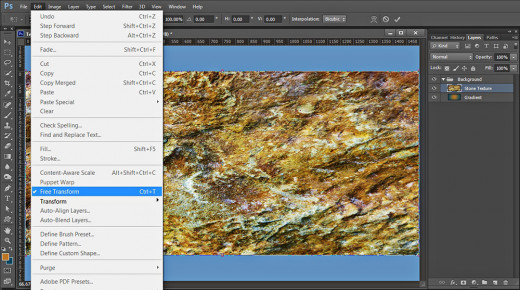
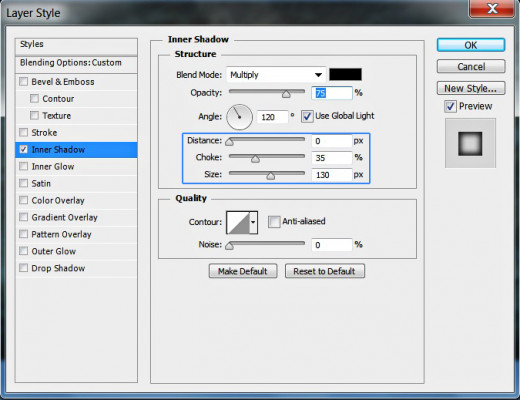
Double click on Stone Texture layer's thumbnail. This will activate the Layer Style dialog box (Layer, Layer Style, Blending Options). Check Inner Shadow Layer Style and change three of its settings: reduce Distance to 0px, increase Choke to 35% and Size to 130px.
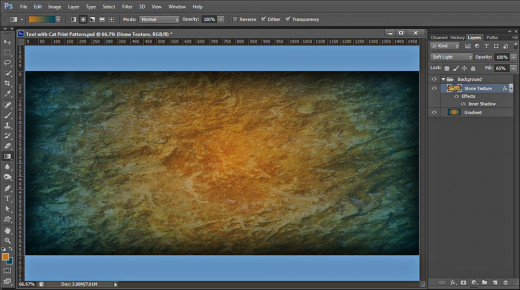
This is the result of the Inner Shadow added to the Stone Texture.
![Adobe Photoshop Elements 2018 [Old Version]](https://m.media-amazon.com/images/I/51AQ4wl7eOL._SL160_.jpg)
Open New Photoshop Document and Start to Create the Pattern with Frame Custom Shape
In Steps 7-10 you have to Create a New .psd document with square canvas, then you have to choose one of the Frame default shapes from the Custom Shape Picker and draw it in Pixels Mode so that it frames the canvas. You also have to apply Drop Shadow Effect on the Frame to make it more prominent.
STEP 7
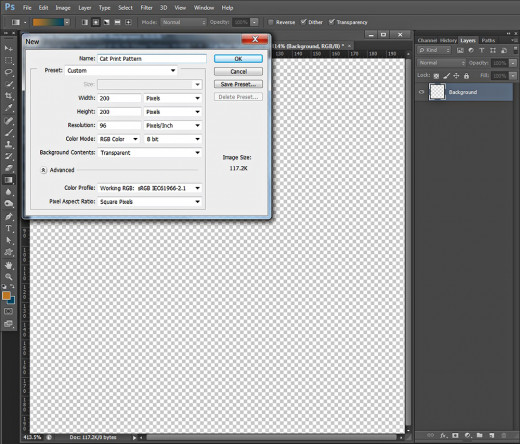
This and the coming steps are dedicated to creating the Cat Paw Pattern. For the purpose create a new .psd file of 200px Width and Height, 96 Pixels/Inch Resolition, RGB Color Mode and Transparent Background Contents. Call the file Cat Print Pattern and rename Layer 1 to Background.
STEP 8
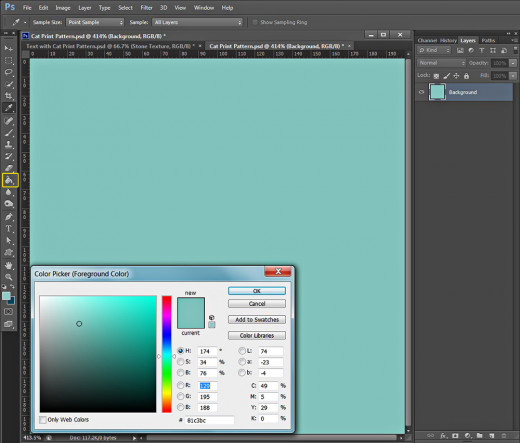
Change the Foreground Color to dreamy blue- #81c3bc then grab Paint Bucket tool and colorize your Background layer.
STEP 9
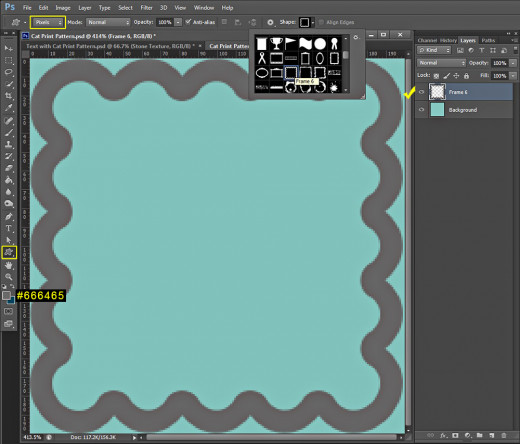
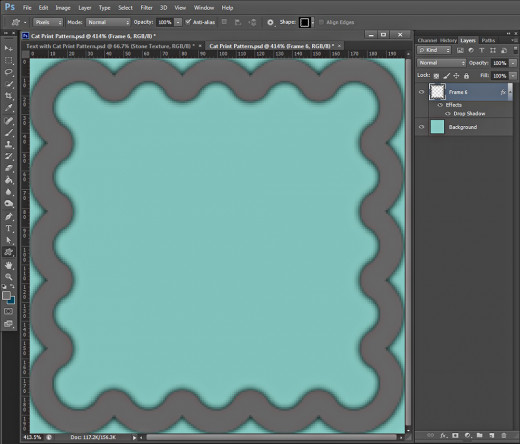
Create a new layer above the Background and name it Frame 6. Set the Foreground Color to grey- #666465 then take Custom Shape tool, change its Mode to Pixels in the Options bar, find Frame 6 Custom Shape from the Picker and draw the frame as you see on the screenshot below. The borders of the frame should not touch the borders of the canvas so leave 1-2 pixels between them.
STEP 10
Double click on Frame 6 layer to call Layer Style box and check Drop Shadow. Change the following two settings: reduce Distance to 0px and increase Spread to 25%.
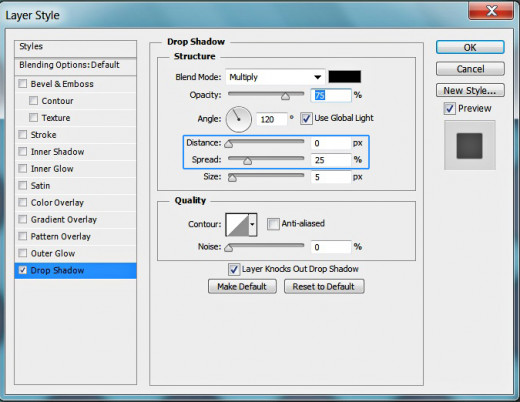
This is how our Frame will look after applying the shadow effect:
Draw the Cat Print Shape, Paste the Layer Style and Define the New Pattern
In the coming two steps you have to draw default Cat Print Shape of Pixels Mode on your canvas. You also should Copy and Paste on the Cat’s Paw the Drop Shadow Layer Style you already applied on the previous Frame 6 layer.
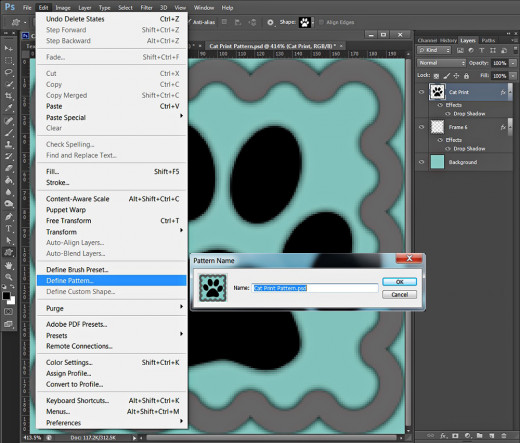
As a final work in the Pattern File, you have to navigate to the Menu bar, select Edit, Define Pattern and give a name to your new Pattern creation.
STEP 11
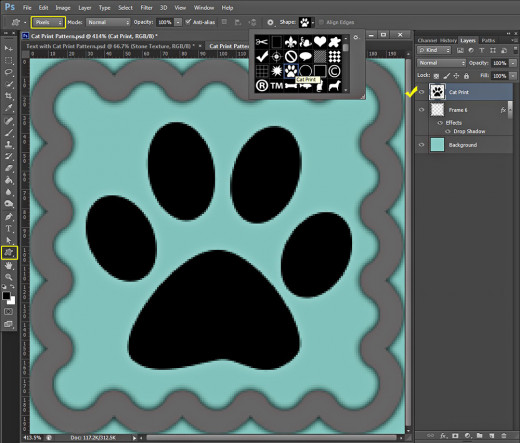
Press D key to set Foreground/Background Color to Black/White then create a new layer on top of Layers pane and call it Cat Print.
Take Custom Shape tool in Pixels Mode and find the Cat Print shape in the Custom Shape Picker. Draw a big black Cat Paw on your canvas as you see on the following screenshot:
Right click on Frame 6 layer and select Copy layer style.
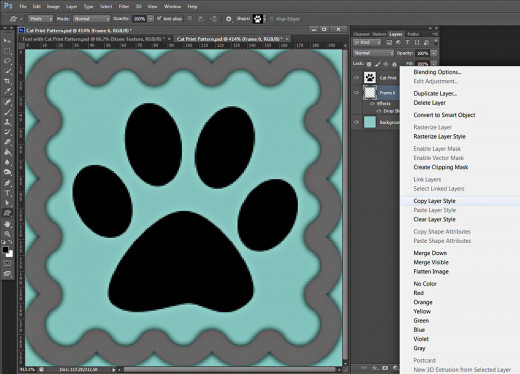
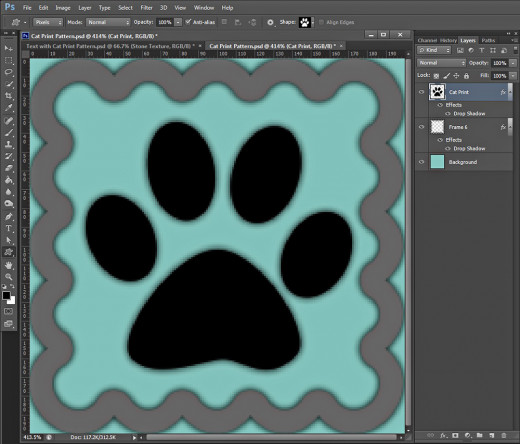
Now right click on Cat Print layer and choose Paste Layer Style. Thus we will apply one and the same layer style on both shape layers.

This should be the result on your canvas:
STEP 12
Now if you like, you can flatten your image before turning it into a pattern. I myself prefer to keep the .psd file intact in order to recollect my actions after reopening the file in months or years.
To create our feline pattern, go to Edit, Define Pattern and when Pattern Name box appears on your screen you'll see that the name of our Cat Print Pattern .psd file will be automatically inserted in Name field. Press OK button to save the new pattern then don't forget to save the Cat Print Pattern .psd file in your folder.
Type the Text and Apply Five Blending Options to Create Unique Effect
From the coming step until Step 19 you have to type your first Text layer using Font which is default for all Photoshop versions.
When you are ready with the Text, duplicate its layer and reduce the Fill Opacity of the copied one to 0%. You’ll be working later in this layer.
Now you should reselect the original Text layer and add five layer styles to it. You have to apply Shadow, Steel Bar (default) Gradient Overlay, Bevel and Emboss and the most important- the newly created Cat Print Pattern. You have to add it as Pattern Overlay and Texture to achieve better effect.
STEP 13
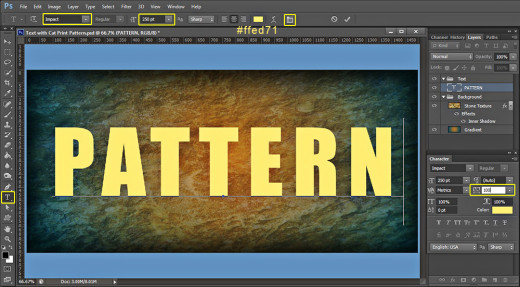
Now go back to your Cat Print Pattern.psd file. We have to prepare the text in this step. Grab Horizontal Type tool, find Impact font (default) from the Font Family drop down menu and set the Font Size to 250pt. Choose yellow for Text color- #ffed71 and type Pattern with capital letters. We also need to increase the distance between the letters because in Steps 21-24 we are going to stroke a path created from the text which will make the letters bigger and they could overlap. So select your text with Text tool, click on Toggle the Character and Paragraph Panels icon in the Options bar and set the Tracking to 100.
Now move Pattern text layer on top of Layers Panel, press Ctrl+G to place it in a group and name it Text.
STEP 14
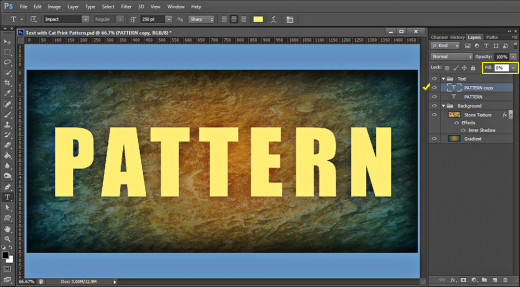
Duplicate Pattern text layer and reduce the Fill Opacity of Pattern copy layer to 0%.
STEP 15
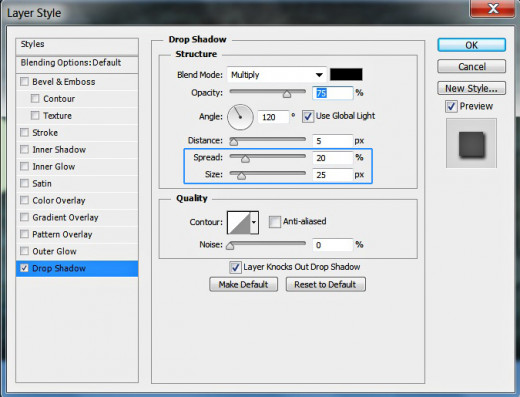
We'll start the big play with layer styles now. Go back to the original Pattern text layer, right click on it and select Blending Options. Select Drop Shadow Layer Style the increase Spread to 20% and Size to 25px.
Keep Layer Style box active as we have to add another four Blending Options.
STEP 16
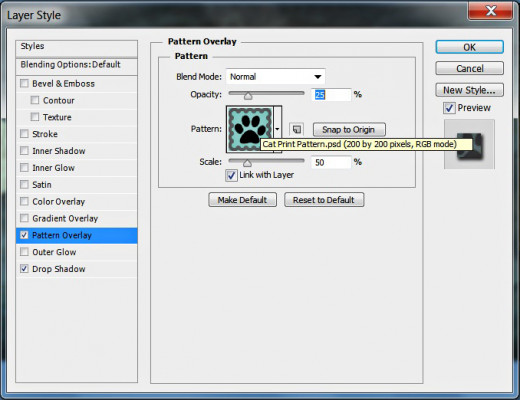
Now we are going to add the first part of the cat paws. For the purpose check Pattern Overlay and insert these settings:
Blend Mode: Normal
Opacity: 25%
Pattern: Cat Print Pattern.psd (200 by 200 pixels, RGB mode)
Scale: 50%
Link with Layer: checked.
STEP 17
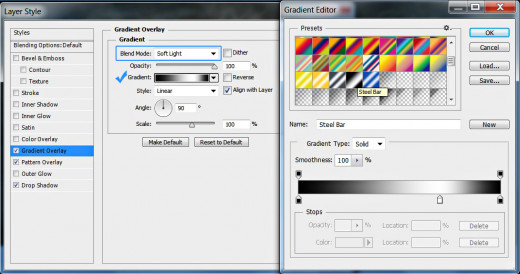
The next layer style to be applied on Pattern text layer is Gradient Overlay. Change only the Blend Mode to Soft Light and find Steel Bar gradient from the Gradient Picker.
STEP 18
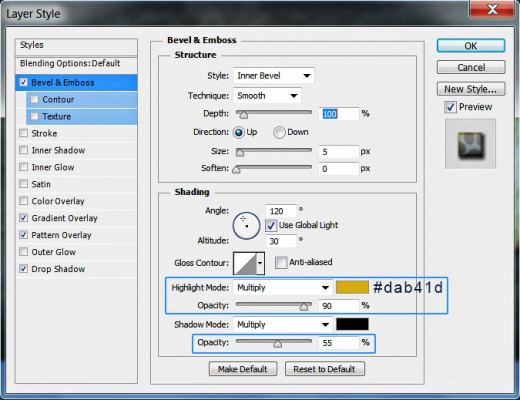
Bevel and Emboss is a Layer Style which adds awesome 3D effects without necessity to use specific 3D instruments. So tick it in Layer Style box and change the following four settings:
Highlight Mode: Multiply
Color for Highlight: #dab41d
Color for Highlight Opacity: 90%
Color of Shadow Opacity: 55%.
STEP 19
In this step we are going to apply again the Cat Print pattern we created, this time as a Texture Overlay. This will give relief to the cat paws and will make them more prominent.
Check Texture Layer Style and insert these settings:
Pattern: Cat Print Pattern.psd (200 by 200 pixels, RGB mode)
Scale: 50%
Depth: +26%
Invert: unchecked
Link with Layer: checked.

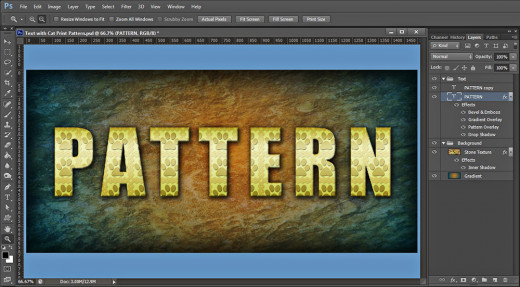
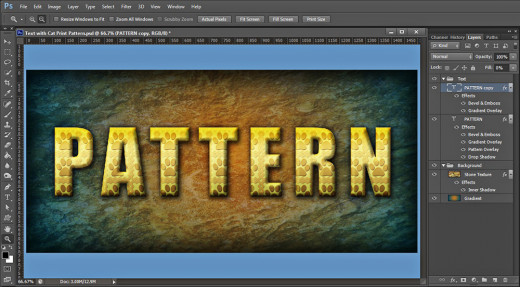
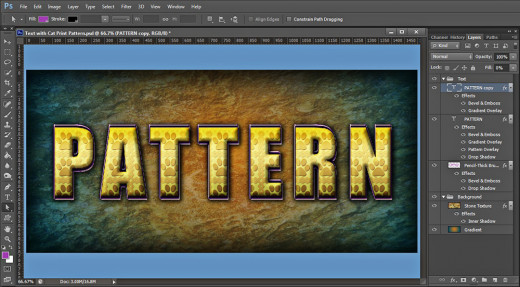
This is how your Pattern text will look so far:
Apply Two Blending Options on the Duplicated Text Layer
You remember that in Step 14 you had to duplicate the Text layer. Now select the copied Text layer which is with 0% Fill Opacity and is invisible. You need to make only the layer styles which you’ll apply on it visible.
You have to add to this duplicated Text layer default Gradient Overlay and 3D Effect.
STEP 20
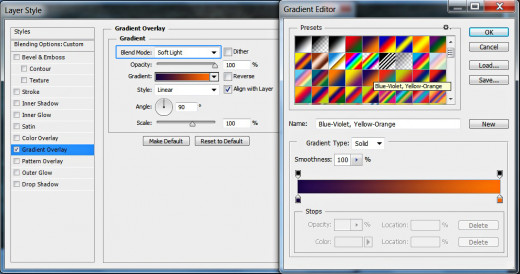
Now select Pattern copy layer (the one with 0% Fill Opacity) and firstly apply on it Gradient Overlay Layer Style. Change the Blend Mode to Soft Light and select Blue-Violet, Yellow-Orange Gradient from the Picker.
STEP 21
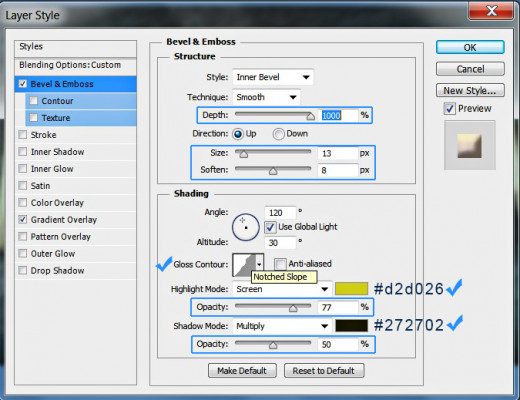
The second Layer Style to be applied on Pattern copy layer is Bevel and Emboss. Change the following settings:
Depth: 1000%
Size: 13px
Soften: 8px
Gloss Contour: Notched Slope
Color for Highlight: #d2d026
Opacity: 77%
Color of Shadow: #272702
Opacity: 50%.
Our Cat Patterned Text is almost ready. In the next steps we have to create Work Path from the Text and to Stroke it with the help of Direct Selection tool and Brush.
Create Work Path from the Text and Stroke it with Default Brush
In the coming step you have to create Work Path from Text layer then Stroke it in a New Layer with default Pencil-Thick Brush. This Brush is exclusive for the higher Photoshop versions and if you don’t have it, you can choose another Brush. Just play with its Size and enjoy the wonderful effects.
STEP 22
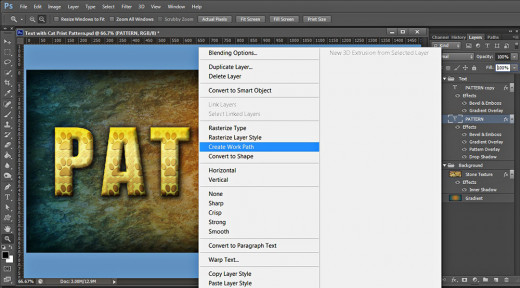
Now right click on Pattern or Pattern copy text layer and select Create Work Path. Your Text will appear bordered with line.
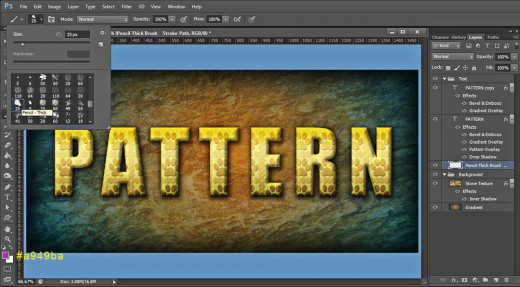
Create a new layer at the bottom of Text group and name it Pencil-Thick Brush. Set the Foreground Color to #a949ba, select Brush Tool and in the Brush Preset Picker find Pencil-Thick Brush of 25px default Size.
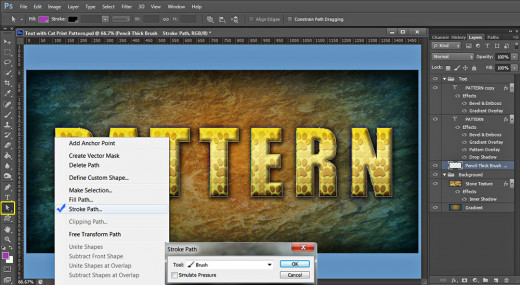
While Pencil-Thick Brush layer is selected, take Direct Selection Tool, right click somewhere on the Path and choose Stroke Path. In Stroke Path box select Brush for Tool and uncheck Simulate Pressure.
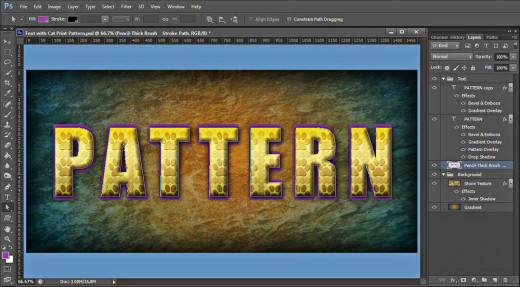
This is how your stroked Path will look if you have followed correctly this Step 22. Press Delete to remove the Work Path if everything is OK.
Add Three Layer Styles to the Pencil-Thick Brush Layer
You will finish this tutorial with applying Blending Options on the stroked Pencil-Thick Brush layer. You should add Drop Shadow, Bevel and Emboss with yellowish Highlight Color and Cone type of Contour. This will create awesome purple border for your Text Effect with Cat’s Paws.
STEP 23
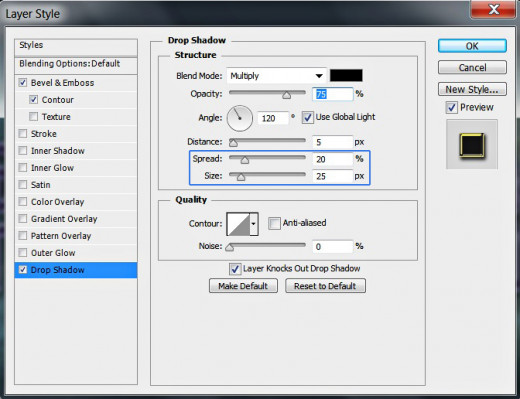
We have to add three layer styles to Pencil-Thick Brush layer too. Firstly apply Drop Shadow and increase its Spread to 20% and Size to 25px.
STEP 24
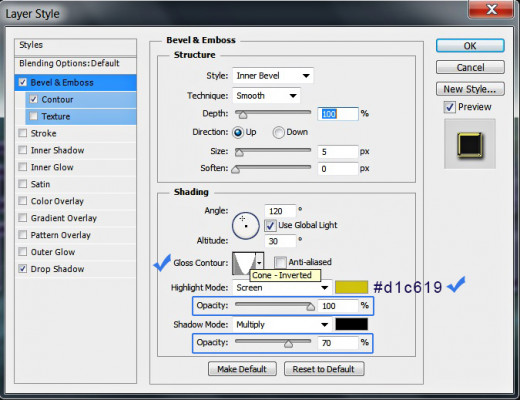
Add also Bevel and Emboss to Pencil-Thick Brush layer and change these settings:
Gloss Contour: Cone-Inverted
Color for Highlight: #d1c619
Color for Highlight Opacity: 100%
Color of Shadow Opacity: 70%.
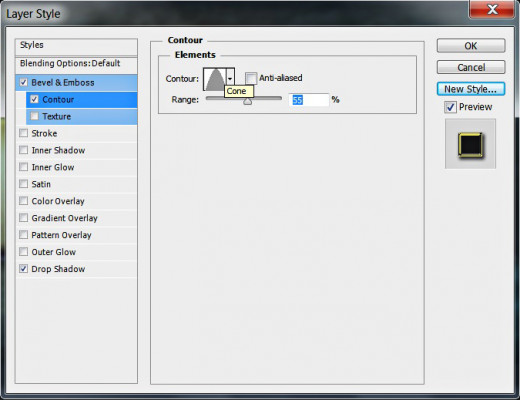
STEP 25
The last layer style to be applied on Pencil-Thick Brush layer is this Contour:
Contour: Cone
Anti-aliased: not checked
Range: 55%.
This is our Cat Paws Text after applying all the layer styles. Our work is completed.
You should have these two groups in Layers panel:
-
Background group with two layers in it: Gradient and Stone Texture;
-
Text group which includes the following three layers: Pencil-Thick Brush layer, Pattern and Pattern copy layer.
STEP 26
This should be your outcome after saving it in .jpg format.
Hope you learned new techniques from this tutorial and found it awesome.
Thank you very much for reading. If you have any questions just drop a comment below. Critiques are welcome too. :)