Create Gorgeous Typography with Custom Shapes and Clipping Masks in Photoshop

Are you interested to learn how to create beautiful Text Effect with Custom Shape Tool, Clipping Masks and Blending Options? This tutorial will show you how to do it in only twenty four short and easy to follow steps.
After having a first look at this typography, you'll get the impression that it is very complicated and needs special skills to be created. You will be surprised, after you read this tutorial, how simple the things are.
This Typography Effect is created in Adobe Photoshop CS6. I have used default Font and Custom shapes as well as my own stock photo of Lichen Texture for the Background, so you won't bother to search the net.
There is another advantage of this tutorial. I usually torment my readers with lots of layer styles which have to be applied to almost any single layer. This time the Blending Options are only two which will be copied and pasted from the Text to the Clipping Mask layers. :)
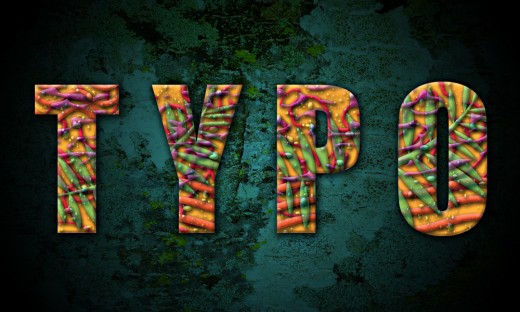
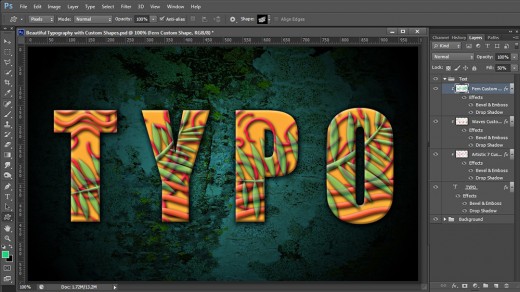
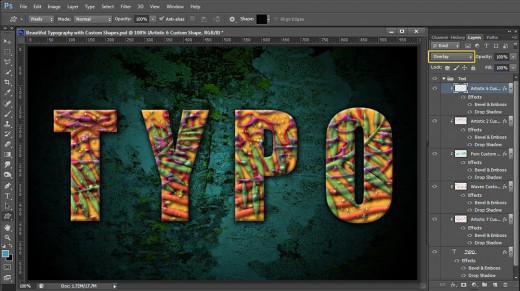
Well, this is the cool typography you are going to create:
STEP 1
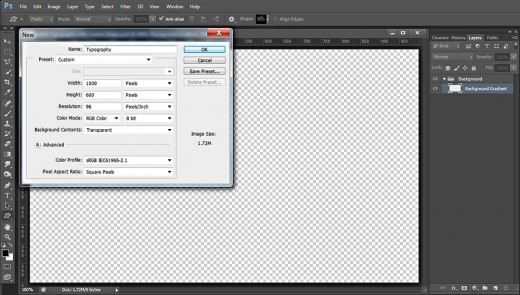
At first open your Adobe Photoshop program to create a new .psd file. Navigate to the Menu bar and select File, New. When New dialog box appears on your screen, insert Typography or any other title you prefer for your document. Set the Width to 1000px and insert 600px for Height. Set the Resolution to 72 or 96 Pixels/Inch and select RGB Color from Color Mode drop down menu.
I have chosen Transparent for Background Content because this will create an editable Layer 1 in Layers panel.
Now double click on Layer 1 name and type Background Gradient in the white space. Go to the Menu bar and select Layer, Group Layers (or press Ctrl+G). Thus we put our first layer in a Group. Rename this Group 1 to Background.
Create Beautiful Rough Background with Radial Gradient and Lichen Texture
In the coming four steps you have to apply navy blue to black Radial Gradient to colorize the first layer in Background group. Your next action is to Paste in a new layer on top of the group the free source image of the Lichen Texture. You should also reduce its Size with Edit, Free Transform and change it Blend Mode.
STEP 2
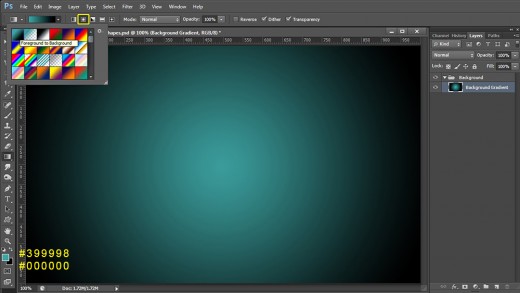
In this step you are going to colorize our transparent background. Keep Background Gradient layer selected, then firstly press D key and after that X key to set Foreground/Background color to White/Black. Now click on the Foreground Color swatch and insert #399998 color code.
Grab Gradient Tool from the Tools bar (hot key G), from the Gradient Picker in the Options bar select Foreground to Background Gradient and click on the Radial Type icon. When you are ready with the instrument settings, drag from the middle to a chosen corner of the canvas to fill it with the Gradient.
STEP 3
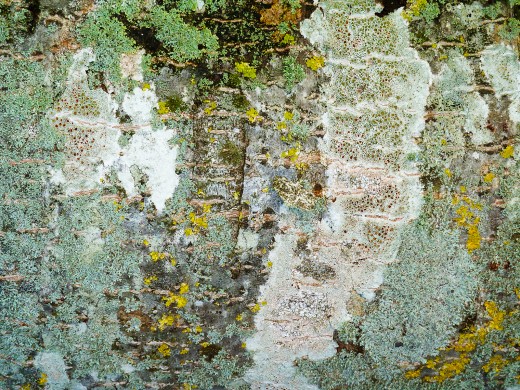
Now you need to download this cool Lichen Texture which will give unique look to our Background. Click on it and when it opens in a new window in high res, right click and choose Save As to place it in your respective folder.
The Texture is my photo and unrestricted stock.
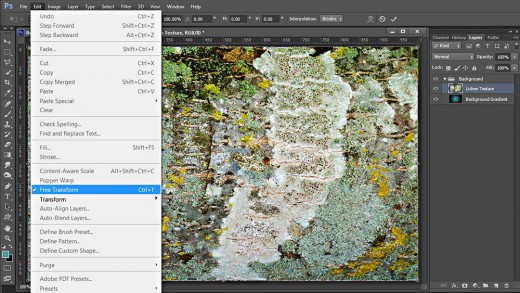
STEP 4
Create a New Layer on top of Background Group and change its name to Lichen Texture. Copy and Paste or use Move Tool to place the previously downloaded Texture in this new layer. You'll need to resize the Texture to make it cover your Background. For the purpose use Edit, Free Transform- when you are ready with moving the nodes, press Enter key to apply the Transformation.
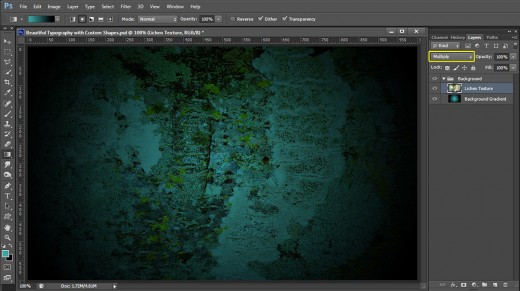
STEP 5
Change the Blend Mode of Lichen Texture layer to Multiply.
Type the Text Using Impact Font and Create 3D Effect with Bevel and Emboss and Drop Shadow
In Steps 6-8 firstly you are going to type the Text using the thick Impact Font with vivid orange color. The Font is exclusive for Photoshop.
Secondly, you have to add two Blending Options to give the Text shadow and volume. You should firstly choose Drop Shadow Effect with changed Distance, Spread and Size options then apply Bevel and Emboss with default colors and reduced Opacity options.
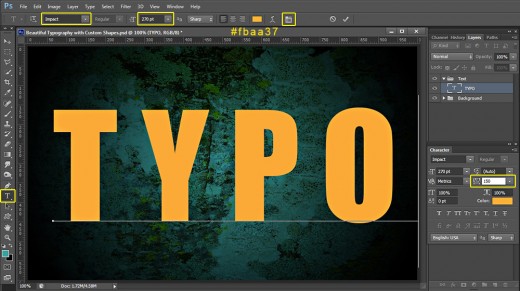
STEP 6
In this step you are going to create our Text which will be the base, the masking agent of the clipping masks you are going to apply later.
Grab Horizontal Type Tool (hot key T) and navigate to the Options bar. Find Impact (default) Font from the Font Family drop down menu. Set the Font Size to 270pt then Set the Text Color to #fbaa37. Click on Toggle the Character and Paragraph Panels icon and set the Tracking to 150. After you are ready with the instrument settings, type Typo using capital letters.
With Typo Text layer selected, press Ctrl+G to group it and rename the new Group to Text.
STEP 7
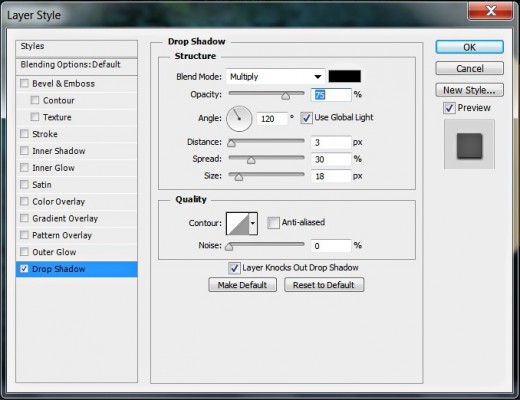
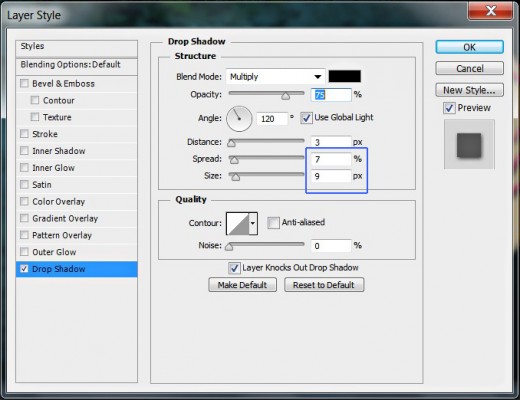
You should not leave our Text looking so flat. It obviously needs layer styles so right click on Typo Text layer and select Blending Options (Layer, Layer Style, Blending Options). Check Drop Shadow and change its settings like this:
Blend Mode: Multiply
Color of Shadow: #000000 (black)
Opacity: 75%
Angle: 120 degrees
Use Global Light: checked
Distance: 3px
Spread: 30%
Size: 18px
Contour: Linear
Anti-aliased: unchecked
Noise: 0%
Layer Knocks Out Drop Shadow: checked.
Keep Layer Style dialog box active as you have to add 3D effect in the coming step.
STEP 8
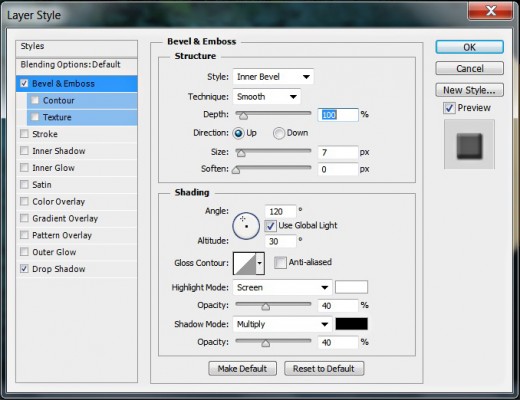
This time check Bevel and Emboss Layer Style and change its settings as follows:
Style: Inner Bevel
Technique: Smooth
Depth: 100%
Direction: Up
Size: 7px
Soften: 0px
Angle: 120 degrees
Use Global Light: checked
Altitude: 30 degrees
Gloss Contour: Linear
Anti-aliased: not checked
Highlight Mode: Screen
Color for Highlight: #ffffff (white)
Opacity: 40%
Shadow Mode: Multiply
Color of Shadow: #000000 (black)
Opacity: 40%.
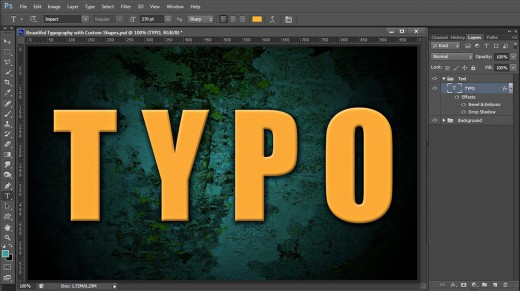
Press OK button to close Layer Style box. You finished our work in our Typo Text layer.
This is how our Text will look after adding Shadow and Bevel and Emboss.
Add Artistic Custom Shape and fix it with Clipping Mask to the Text
In Steps 9-12 you are going to draw on a new layer on top of Text group beautiful Artistic 7 Shape from the Custom Shape Picker. This Shape is default for the higher Photoshop versions but you can replace it with another similar vector shape. Don’t be afraid to use your imagination. You should apply Clipping Mask after you have drawn the Artistic Shape shape then you have to Copy and Paste on the Clipping Mask Layer the same Drop Shadow used on the Text.
STEP 9
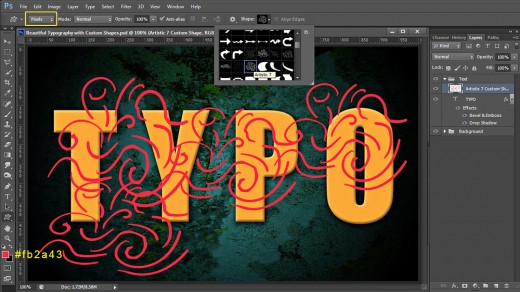
Now firstly Set Foreground Color to #fb2a43. Create a New Layer on top of Text Group and call it Artistic 7 Custom Shape. Navigate to the Tools bar, select custom Shape Tool then in the Options bar change its Mode to Pixels. Find Artistic 7 shape in the Custom Shape picker and draw it a few times. It is not necessary to get the same result as on my screenshot. You might want to achieve another effect.
STEP 10
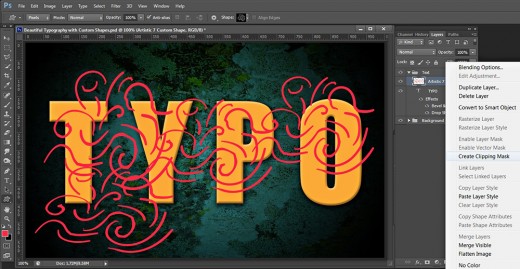
With this step the fun part starts. You are going to make the first Clipping Mask. As I said before, our Text layer will play the masking agent. So right click on Artistic 7 Custom Shape layer and choose Create Clipping Mask. You can do the same by holding down Alt key then click between both Text and Custom shape layers when a black arrow appears on their border.
STEP 11
Compare your canvas with my screenshot below. You should get similar result after applying the Clipping Mask.

STEP 12
Now you are to copy and paste the Blending Options added to the Text layer. So right click on Typo layer, select Copy Layer Style, then right click on Artistic 7 Custom Shape layer and choose Paste Layer Style. You need to make only two adjustments in Drop Shadow box. For the purpose double click on Drop Shadow which is below Artistic 7 Custom Shape layer then change the Spread to 7% and Size to 9px.
Draw Waves Custom Shape, Apply Clipping Mask and Make it More Prominent with Shadow Effect
In the next three steps you have to add awesome wavy pattern to your Text Effect. For the purpose you will draw Waves Custom Shape on a new layer, then apply Clipping Mask and Paste the Shadow Effect which you have already added to the previous masked Shape.
STEP 13
Set the Foreground color to #fd5f2f then Create a New Layer on top of Text Group and rename it to Waves Custom Shape.
Grab Custom Shape Tool in Pixels Mode and find the Waves shape in the Custom Shape Picker. Draw two Waves shapes as you see on the screenshot. If you like you can draw more of them and on different places.
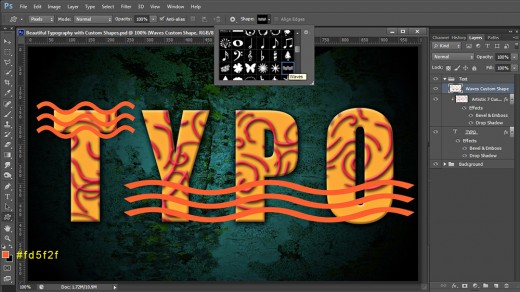
STEP 14
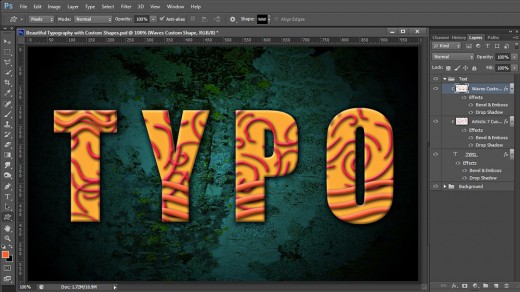
OK, after you are ready with drawing our cool orange Waves, right click on their layer and select Create Clipping Mask. You should get the following result:

STEP 15
Copy the layer styles from Artistic 7 Custom Shape layer and Paste them on Waves Custom Shape layer.
Beautify Your Typography Masterpiece with Fern Leaves
In Steps 16-18 you have to draw default Fern Custom Shape in a new layer on top of Text group. In order to make the Shape translucent but to preserve the effect of the layer styles, you should reduce its Fill Opacity.
You should proceed forward with applying Clipping Mask and the same Shadow Effect you have already added to the prevous two custom shapes.
STEP 16
It's time to add the next awesome shape to beautify our Text. Firstly Create a New Layer on top of Text Group and name it Fern Custom Shape. Change Foreground Color to #20c277 then take Custom Shape and find the Fern Leaf in the Picker. Draw as many leaves as you like.
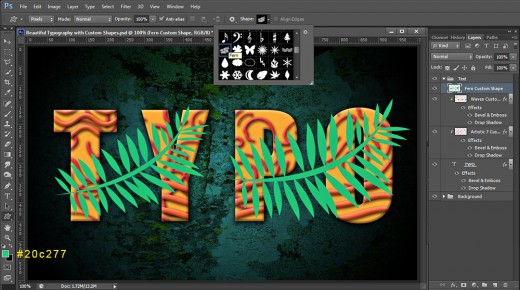
STEP 17
Reduce Fill Opacity of Fern Custom Shape layer to 50% to make the leaves translucent.

STEP 18
Create Layer Mask by right clicking on Fern Custom Shape layer then Copy and Paste on it the layer styles applied on any of the previous Custom Shape layers.
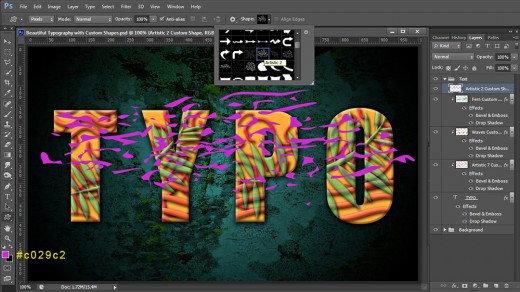
Add Artistic 2 Custom Shape to the Upper Half of Your Text
In the coming two steps you have to draw purple colored Artistic 2 Custom Shape which is also exclusive for Photoshop. Your next action is to apply Clipping Mask and Paste the Shadow Effect from any of the previous masked Custom Shape layers.
STEP 19
Now you need another layer for the new shape you are going to use. Create again a New Layer on top of Text Group and name it Artistic 2 Custom Shape. Change the Foreground color to #c029c2, take Custom Shape Tool and find Artistic 2 shape in the Picker. Draw it so that it almost covers the letters.
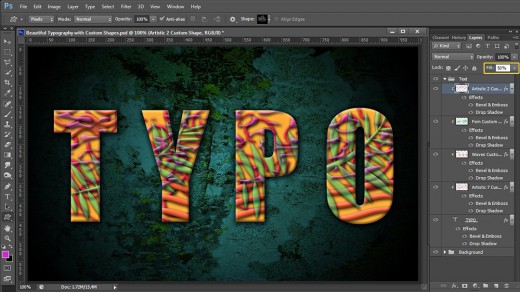
STEP 20
Apply Clipping Mask on Artistic 2 Custom Shape layer then Copy and Paste the Blending Options added to any of the previous Custom Shape layers. Reduce the Fill Opacity to 50%.
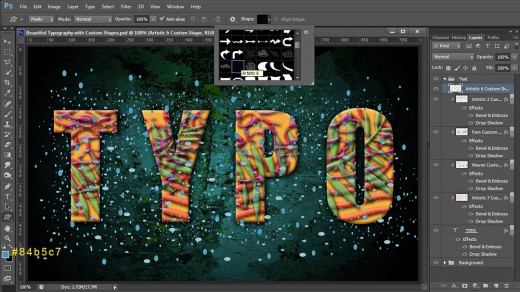
Create Sand Effect with Artistic 6 Shape
You will finish the work on this awesome typography with the help of default Artistic Custom Shape of blue color. This will create the illusion of Text sprinkled with Sand. You should also change the Blend Mode of this Shape layer, apply Clipping Mask and Paste the same Drop Shadow used for the other Custom Shapes.
STEP 21
Take a deep breath. You have only one shape to add in this step. Firstly change the Foreground color to #84b5c7. Create a New Layer on top of Text Group and call it Artistic 6 Custom Shape then grab again Custom Shape Tool and find Artistic 6 shape in the Picker. Draw a few times with the instrument to cover the text with awesome blue spots.
STEP 22
Now you'll treat our Artistic 6 Custom Shape layer as the previous ones. At first apply Clipping Mask then Copy and Paste the layer styles from any Custom Shape layer. When ready, change the Blend Mode to Overlay. See the screenshot below for a reference.
STEP 23
Our gorgeous colorful typography is ready. You should have these groups of layers in Layers pane:
-
Background Group which contains two layers: Background Gradient and Lichen Texture and
-
Text Group which includes one base Typo Text layer and five Clipping Mask layers- Artistic 7, Waves, Fern, Artistic 2 and Artistic 6 Custom Shape layer.
STEP 24
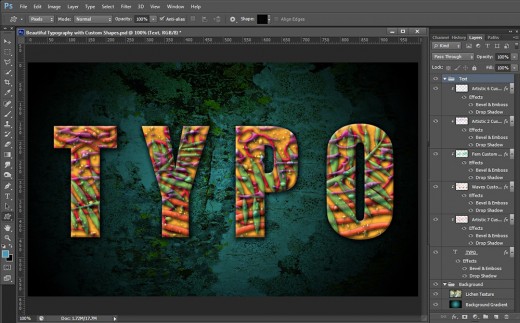
This is the final result saved in .jpg format. I applied Filter, Sharpen, Unsharp Mask on this .jpg file to improve the quality. You can use the same Unsharp Mask Filter or Filter, Other, High Pass. It is up to you how to edit your file.
Hope you learned something new from this tutorial and liked the way Clipping Mask is used to create awesome text effects. Thanks a lot for reading and have a great day.


